For this project, I needed five Virtual Machines. Two for pfsense Firewalls, one for the Webserver in DMZ, one Windows 10 Pro VM in the LAN, and one Windows 11 outside the LAN to check VPN Connection.
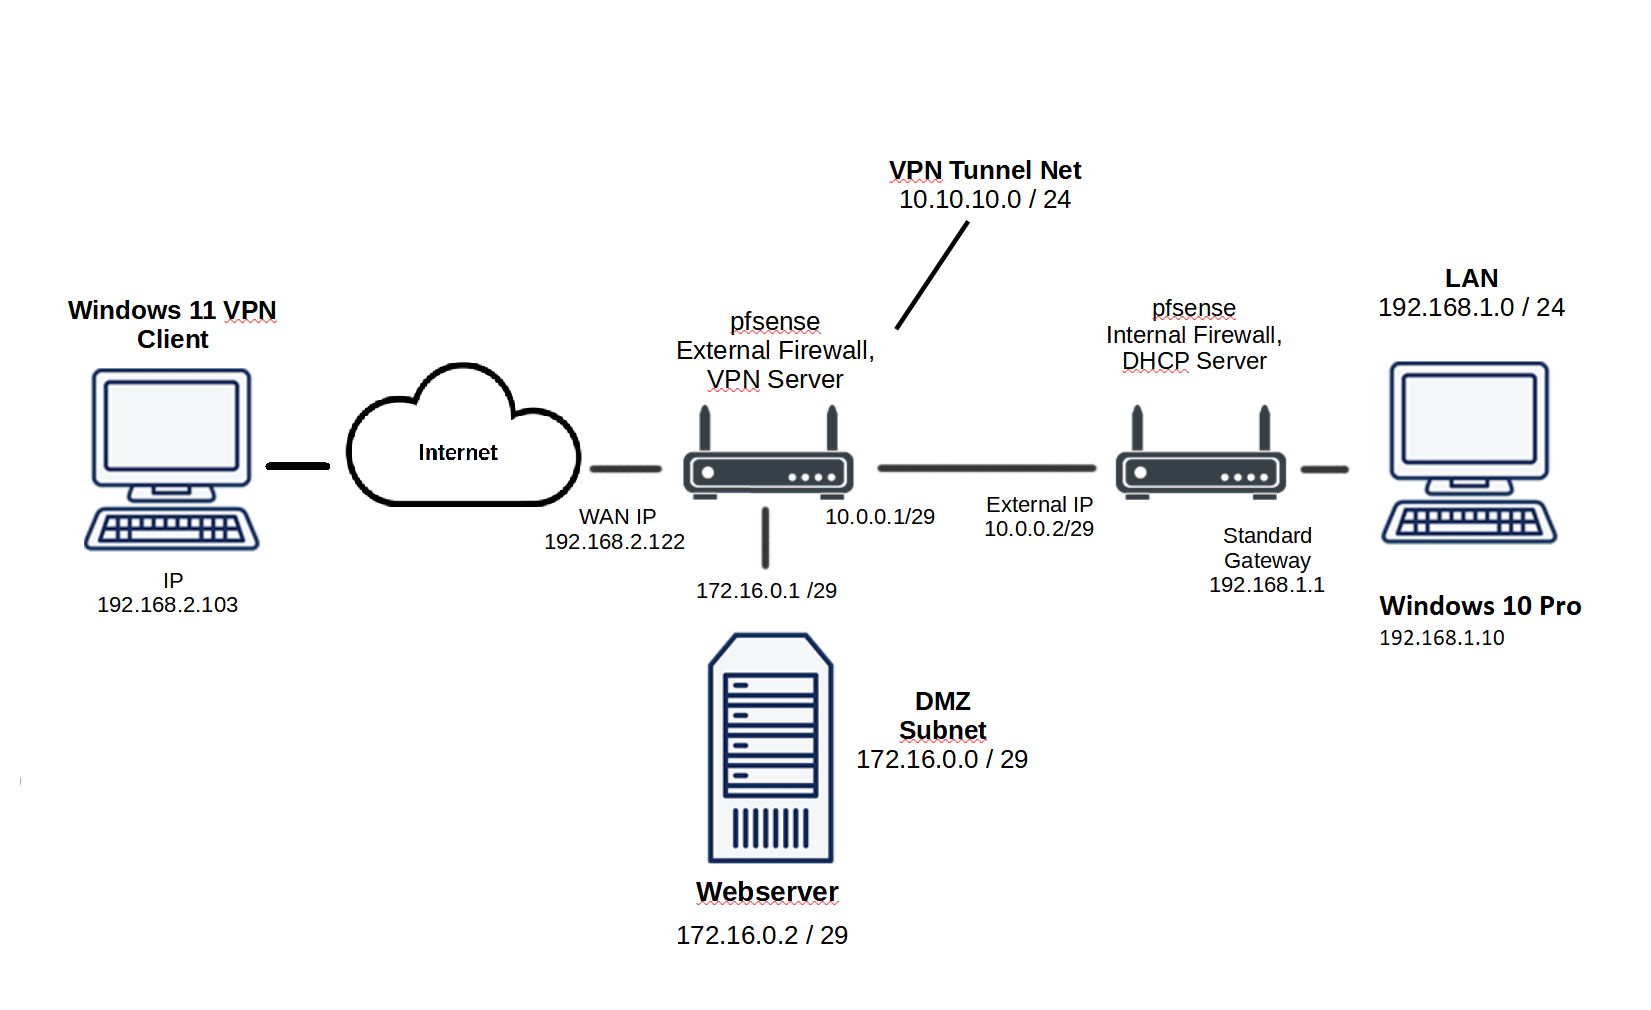
The image below represents the desired Architecture for this project
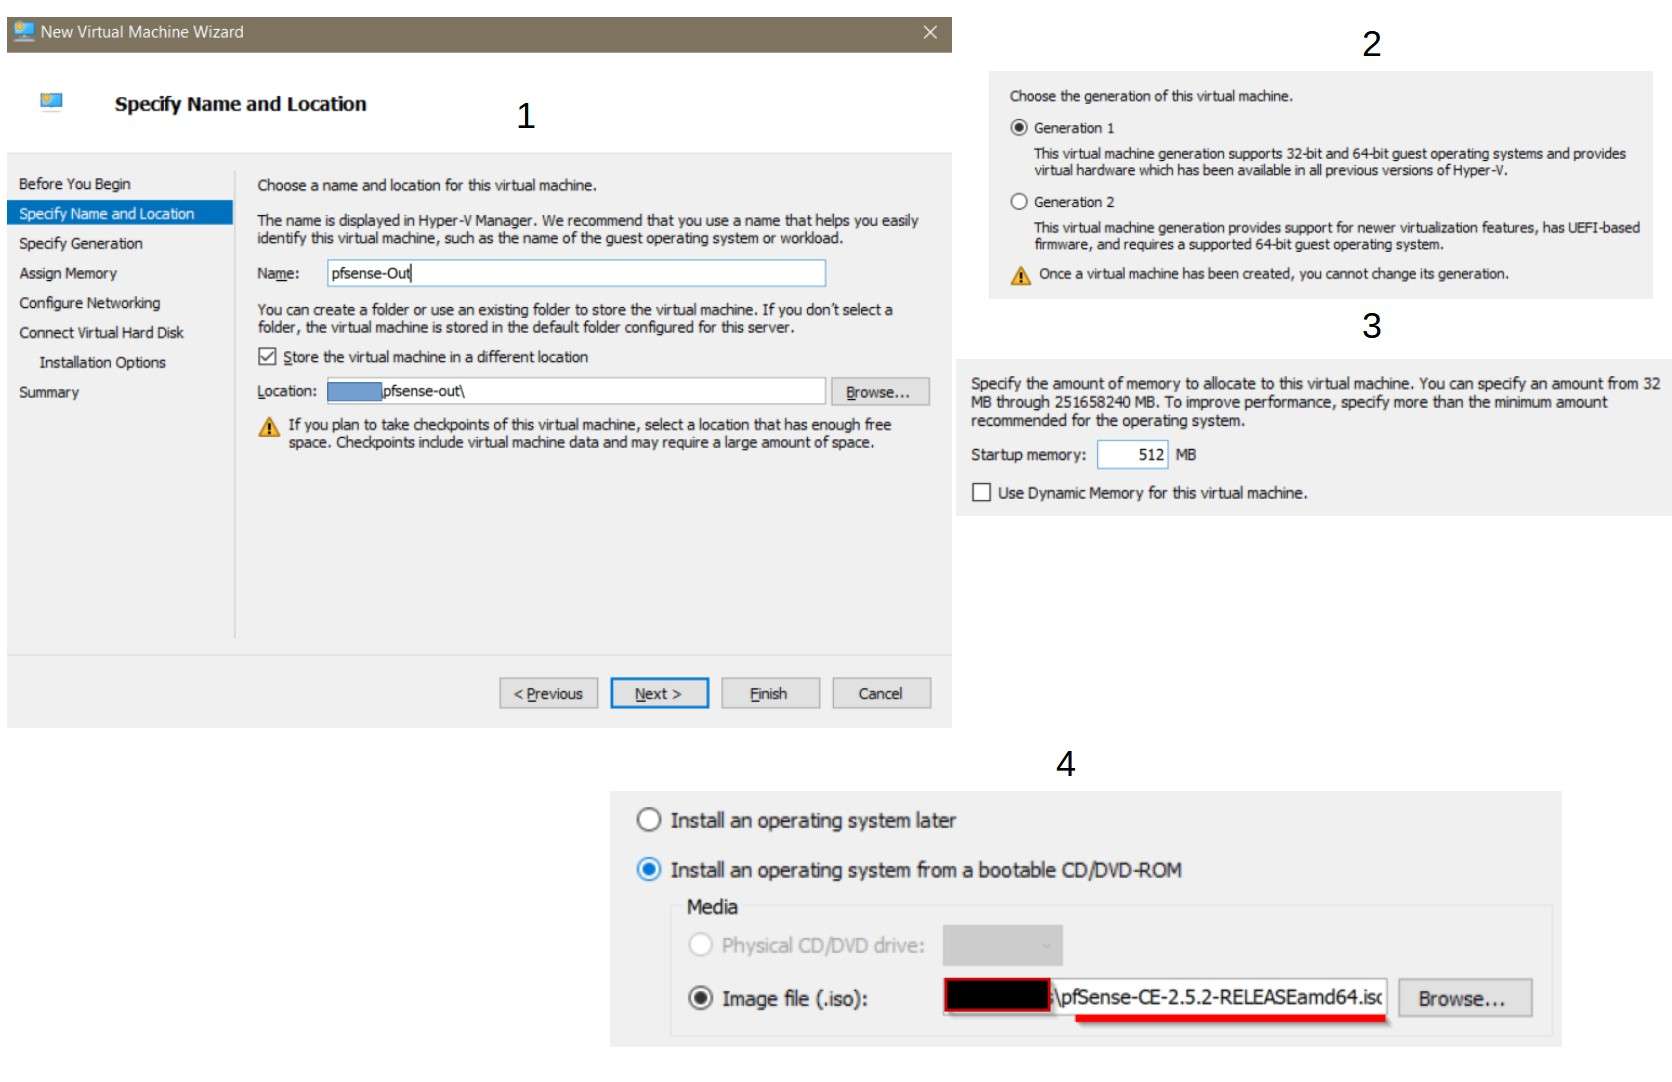
From this link, pfSsense ISO can be downloaded
https://www.pfsense.org/download/
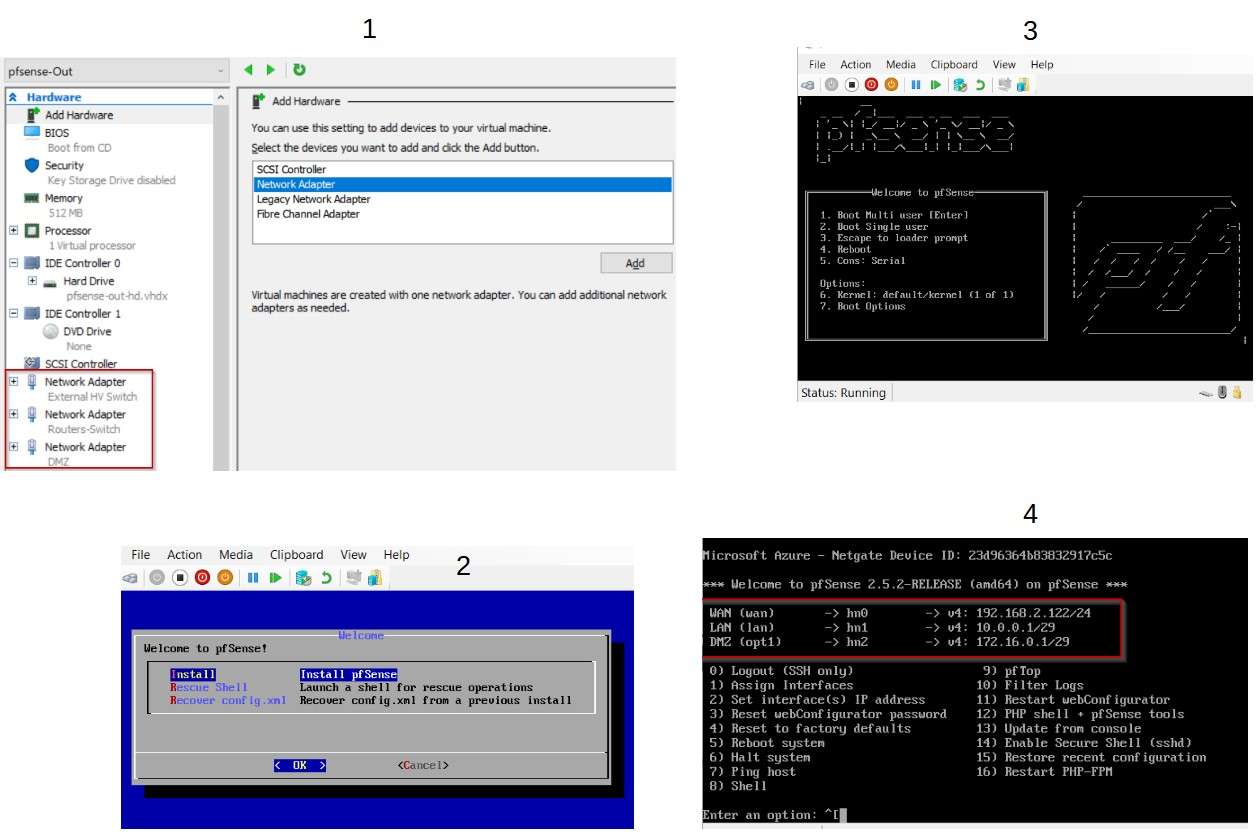
pfSense is a free open source customized distribution of FreeBSD. Creating pfSense VM requires a Generation 1 virtual machine and a minimum of 512 MB RAM.
External pfSense firewall has three NICs and the installation process is straightforward.
WAN nic: 192.168.2.122/24
LAN nic: 10.0.0.1/29
DMZ nic: 172.16.0.1/29
A quick tip: If the booting process doesn’t start, the secure boot should be turned off from the security tab in HyperV.
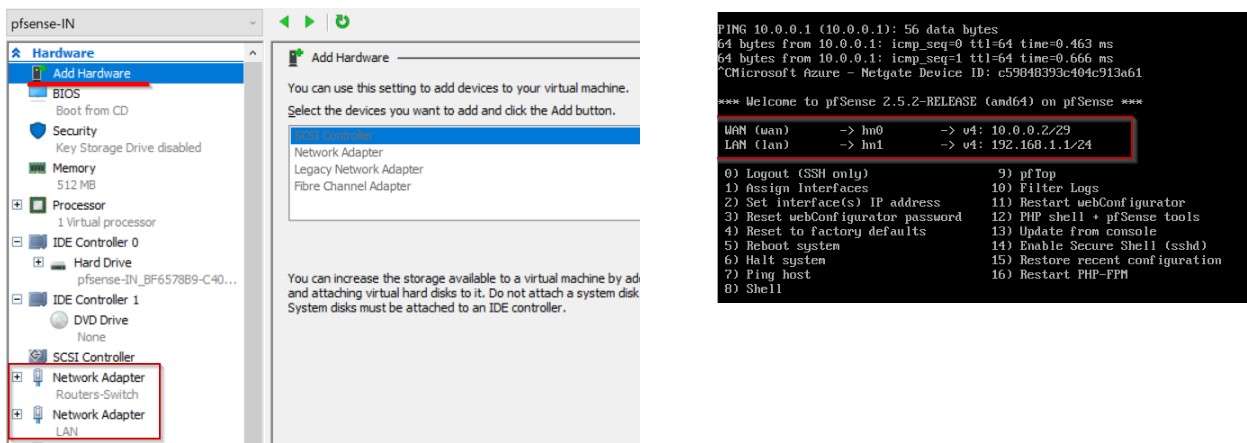
Intern pfSense Firewall has two NICs and it is configured:
WAN nic: 10.0.0.2 /29
LAN nic: 192.168.1.1/24
To configure pfSense firewall I placed a Windows VM in the same LAN as the firewall LAN, for example:
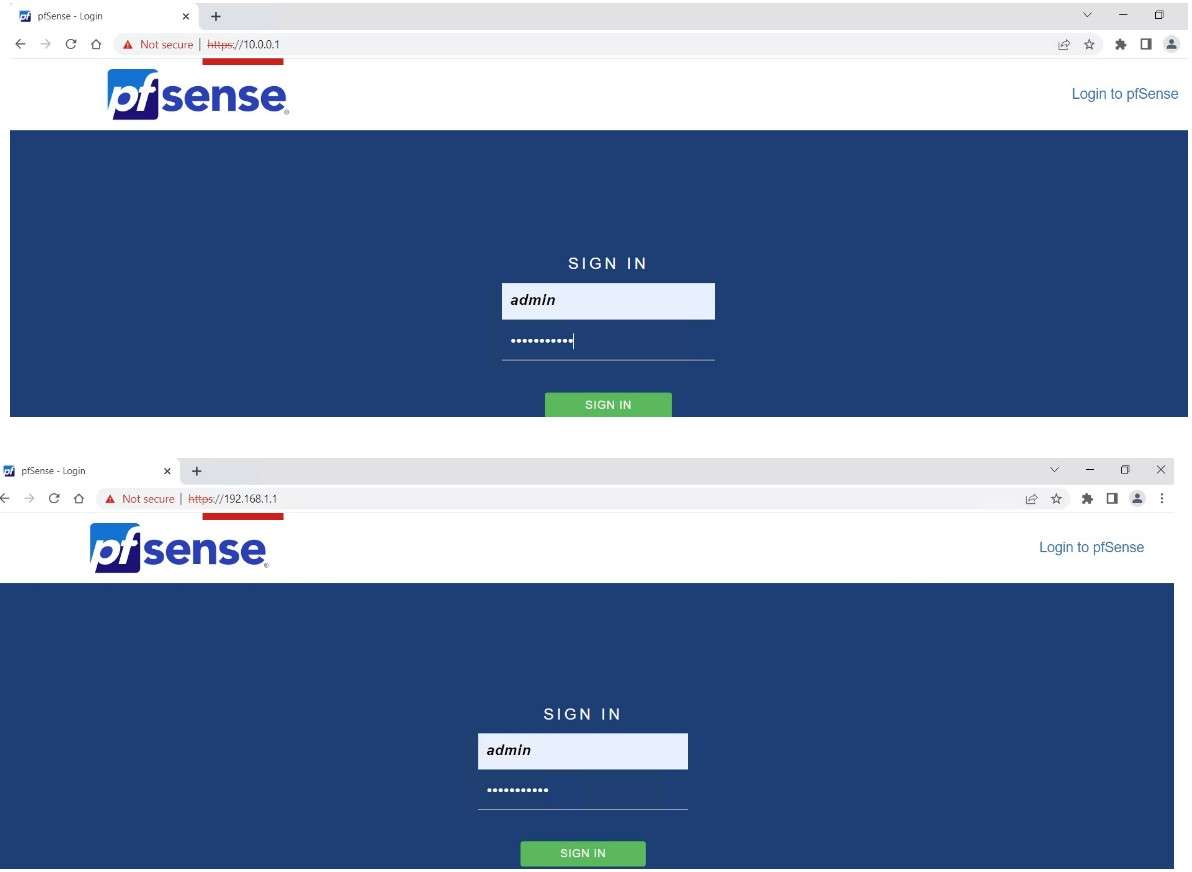
I can access the Intern Firewall Web Interface by typing its LAN IP Address 192.168.1.1 in the Web Browser, also the external firewall is reachable over its LAN IP Address 10.0.0.1
The default user and password is
User: admin
Passw: pfsense
After Login it is recommended to change the default user and password.
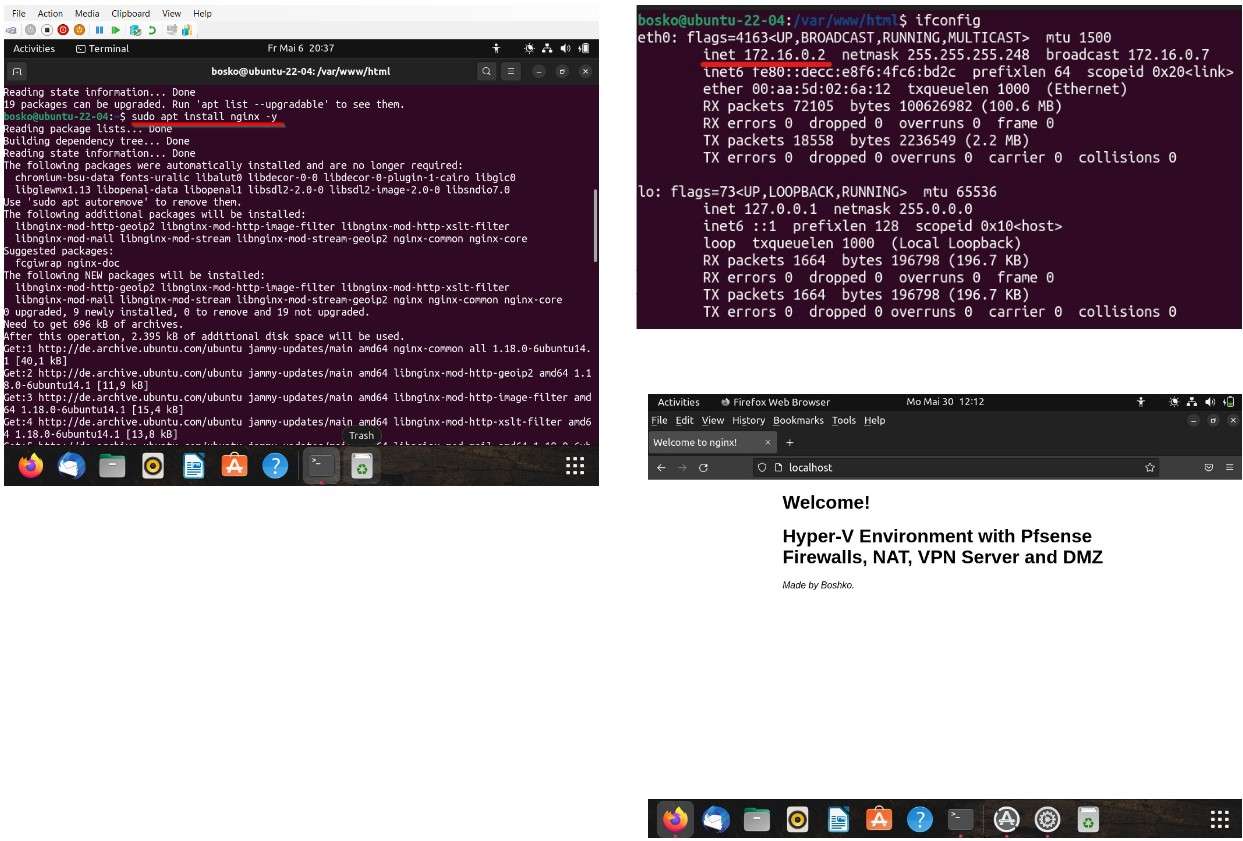
Before continuing to configure the firewall and adding some rules, I placed an Ubuntu VM in the DMZ with an IP of 172.16.0.2 and installed a simple Nginx webserver.
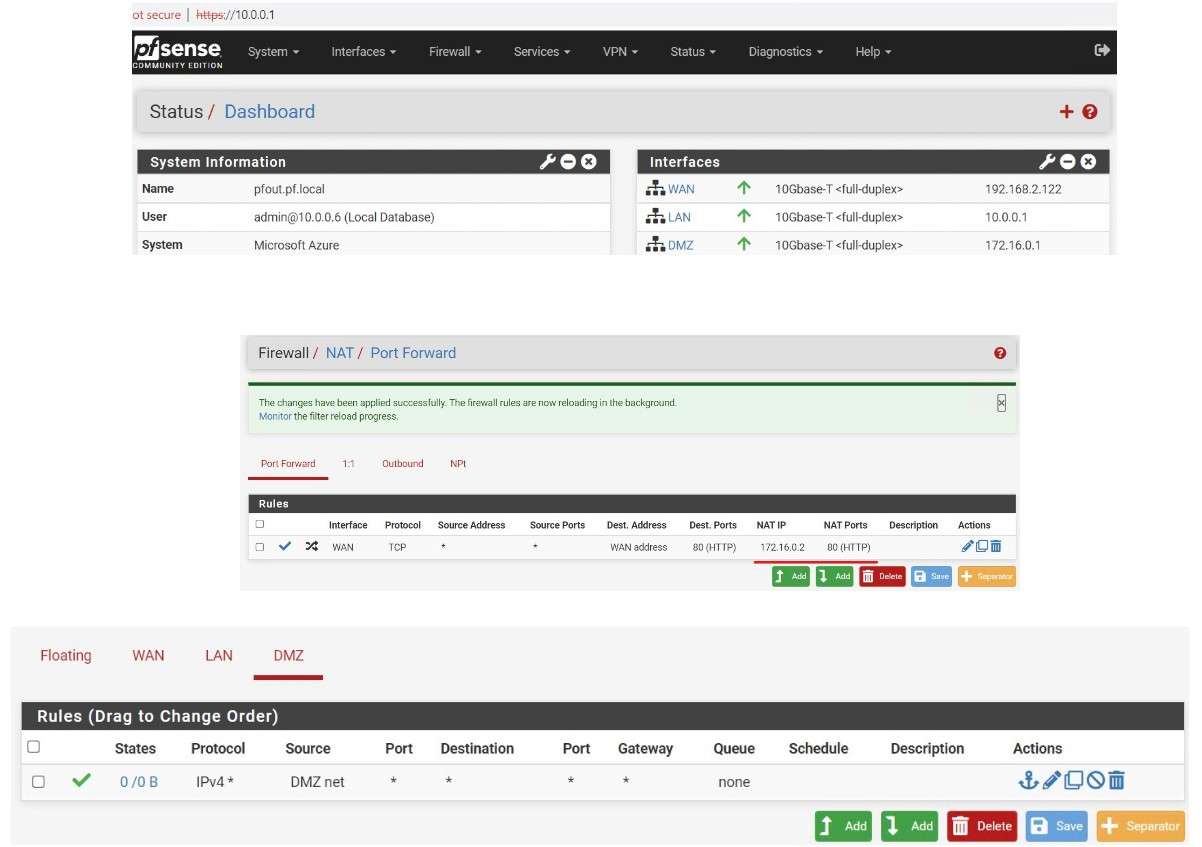
Next, I configured to the external firewall a NAT Rule and all the HTTP Requests on the WAN IP address will be forwarded to the webserver in DMZ.
Also, the DMZ net and the LAN net should communicate with the outside world, so I enabled the Outgoing traffic.
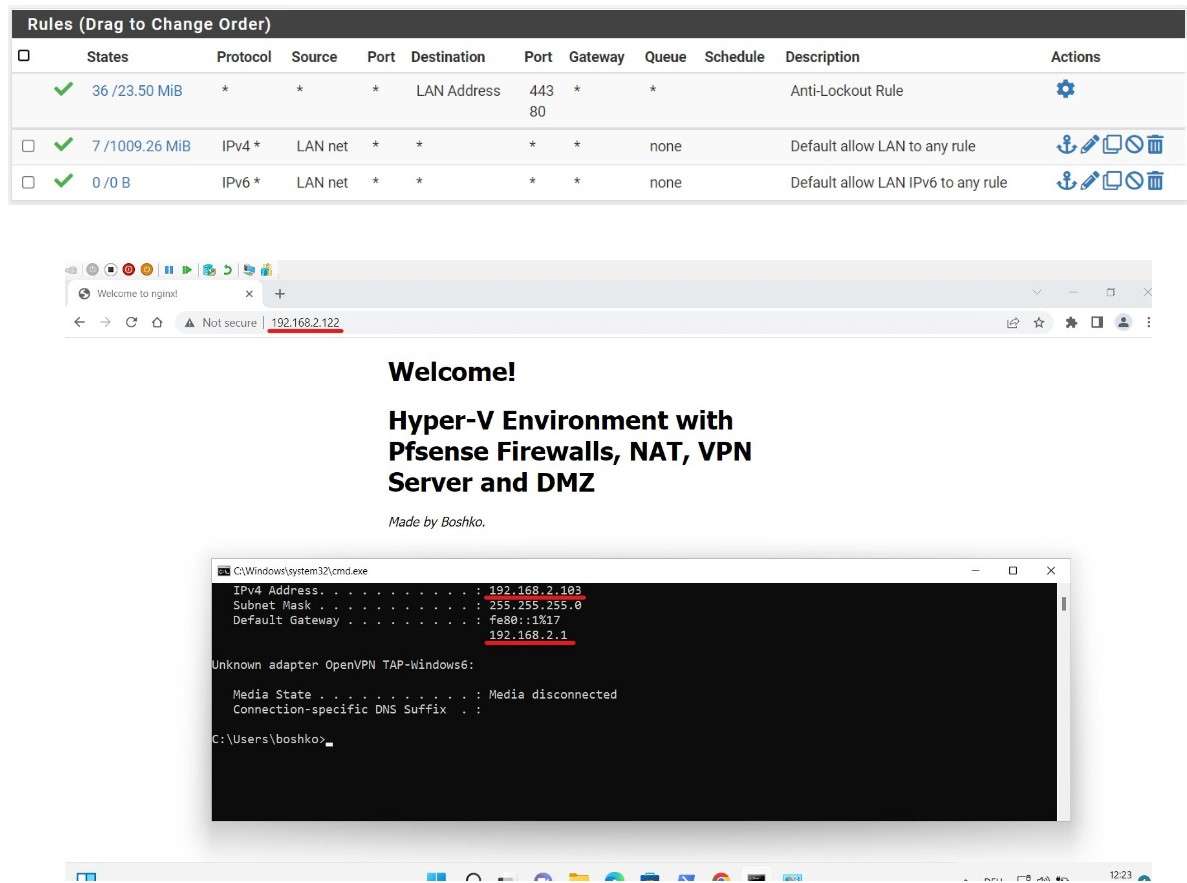
After that, I checked from the Windows 11 VM if the website is reachable on the WAN IP address
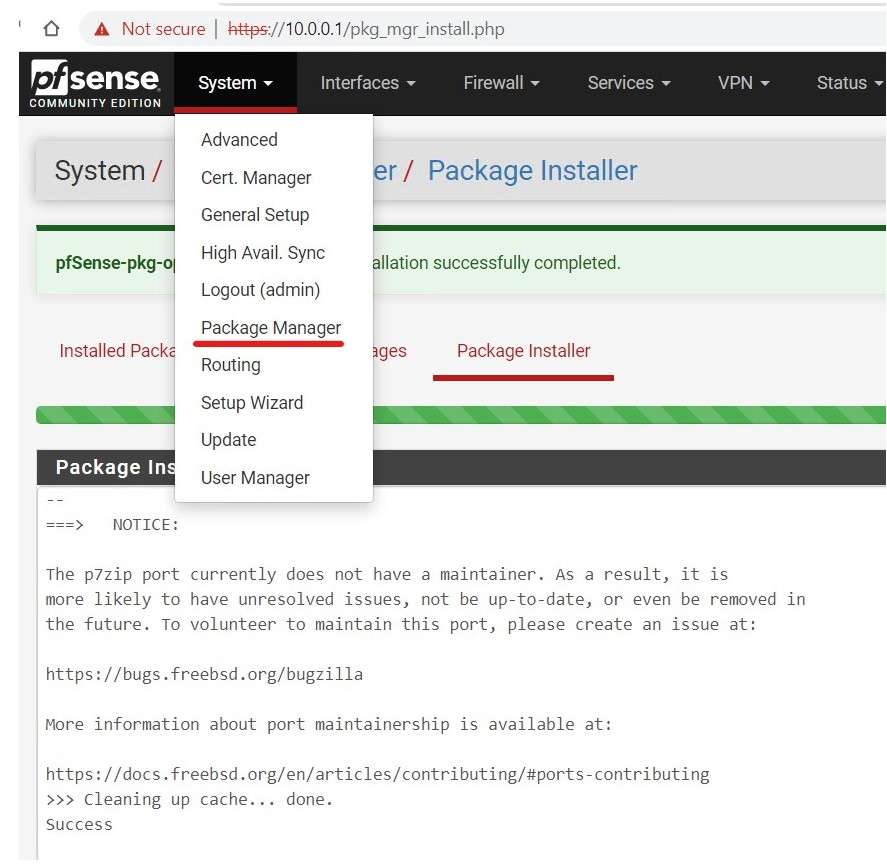
Before configuring OpenVPN Server in the external firewall I Installed the openvpn-client-export packet. This packet allows an easy OpenVPN client installation on the VPN Client VM.

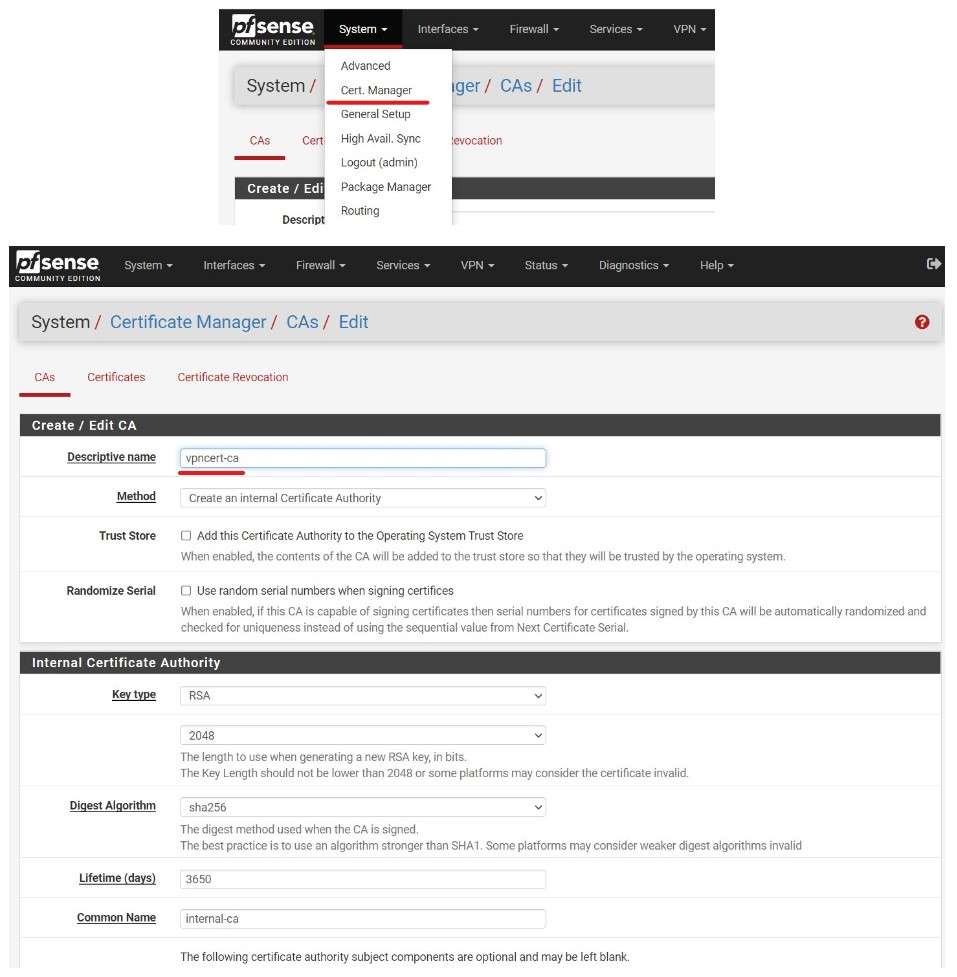
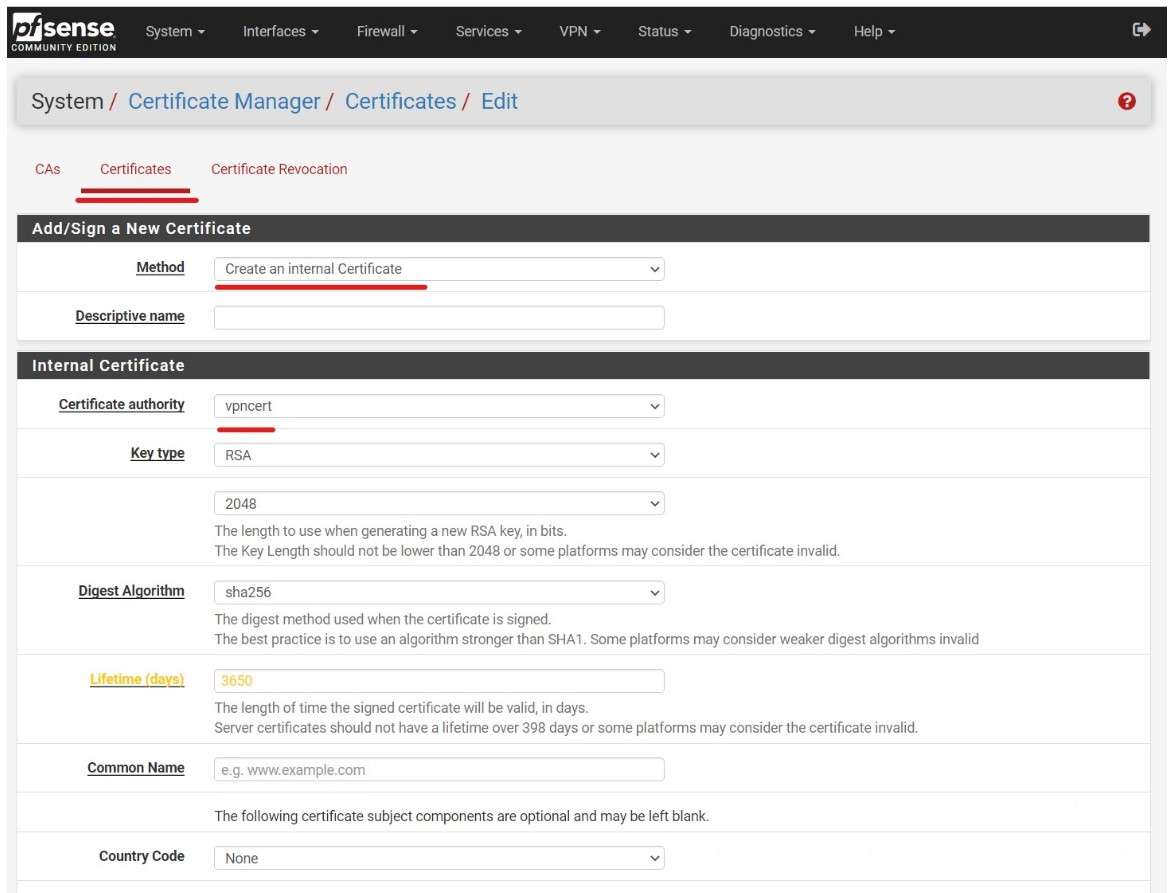
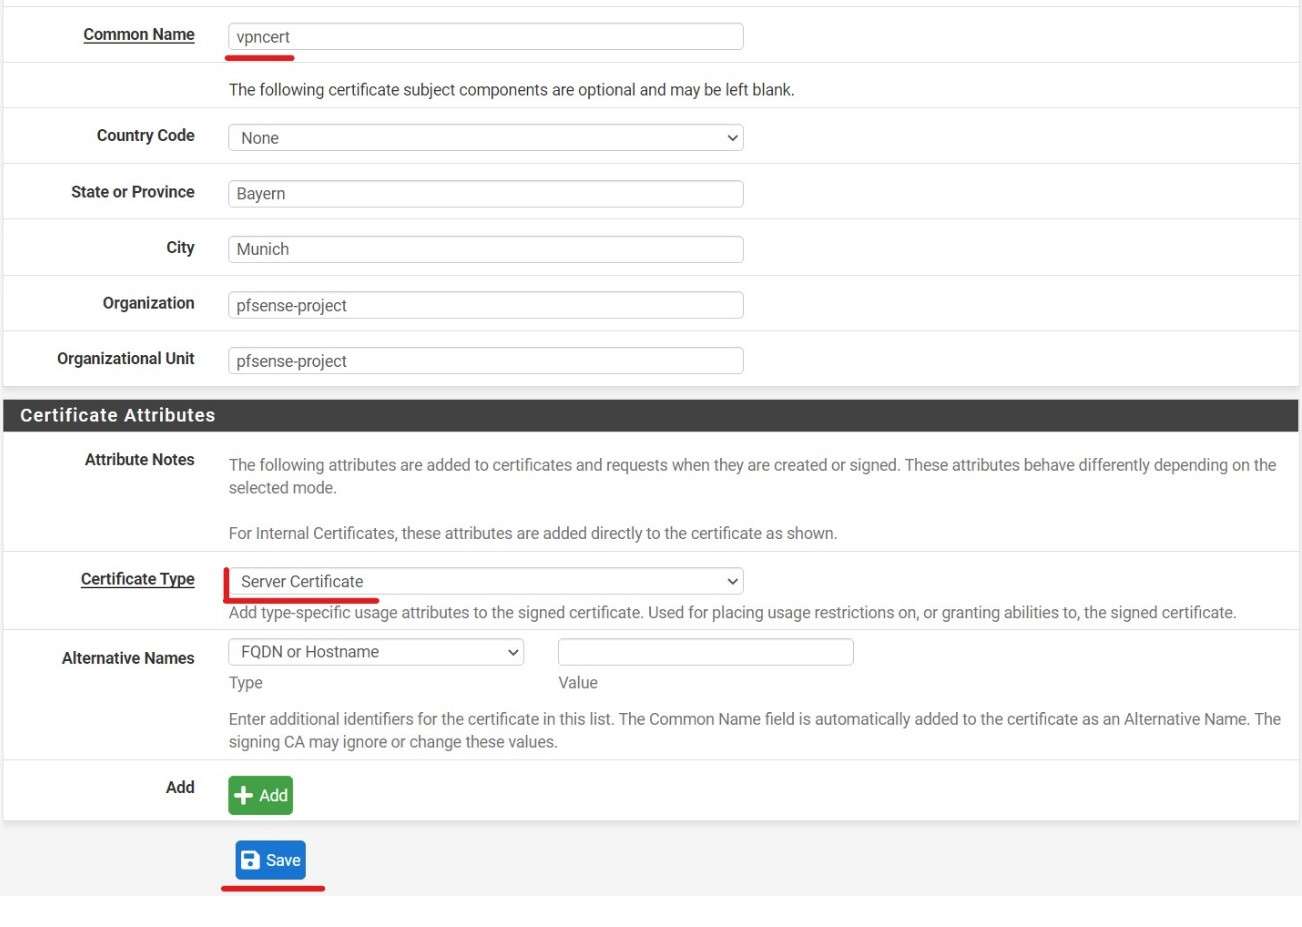
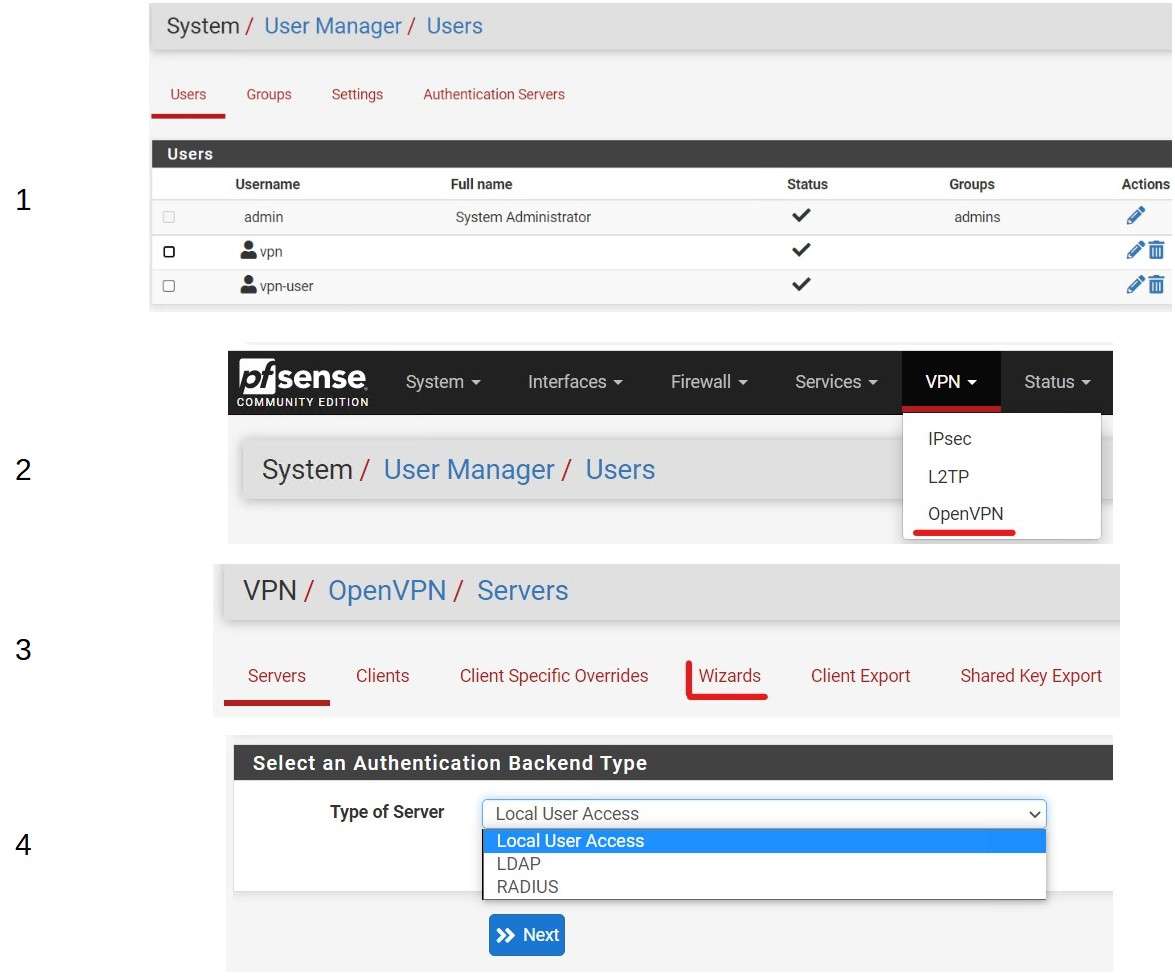
To Configure an OpenVPN Server, first I need to create Certificate Authority and a OpenVPN Server certificate.
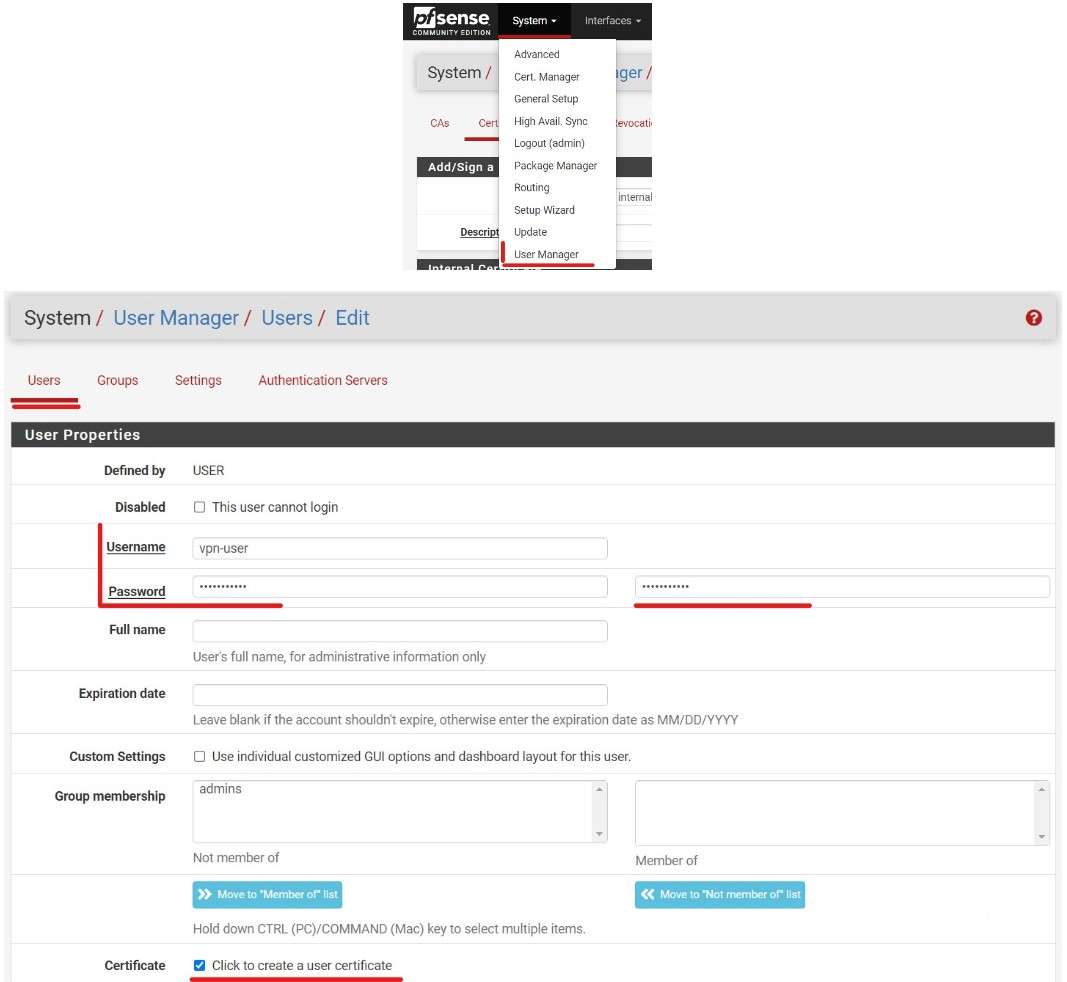
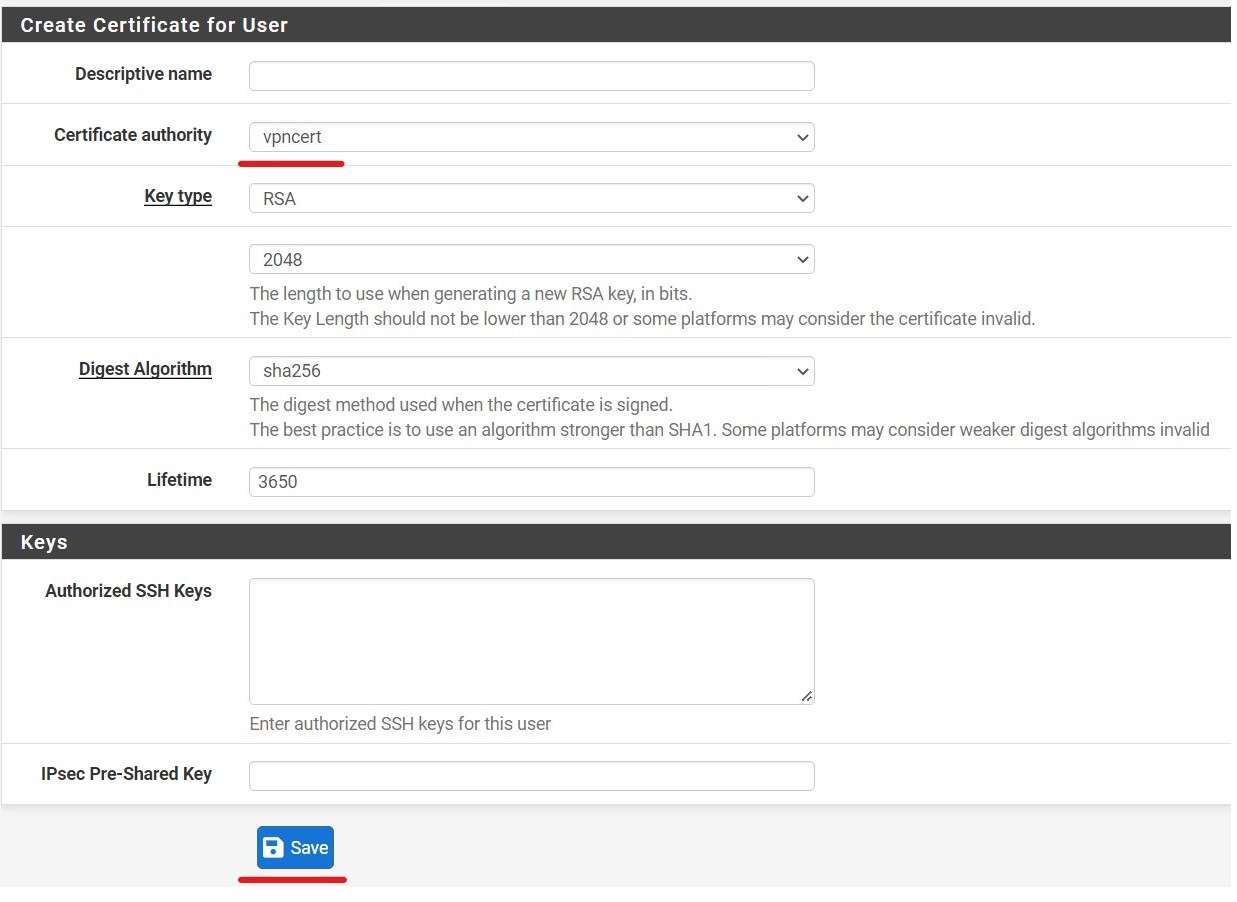
After creating a CA and Server certificate I created two OpenVPN Users.
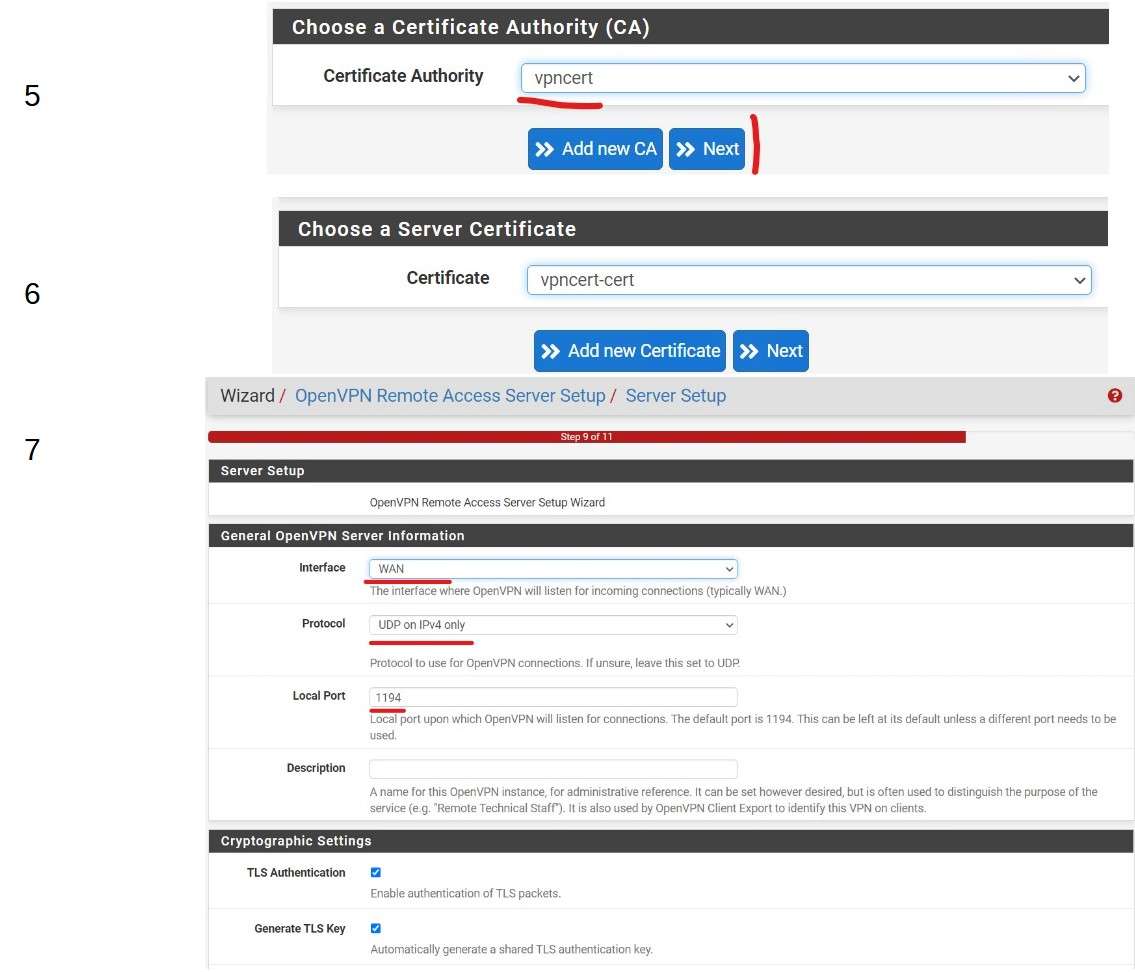
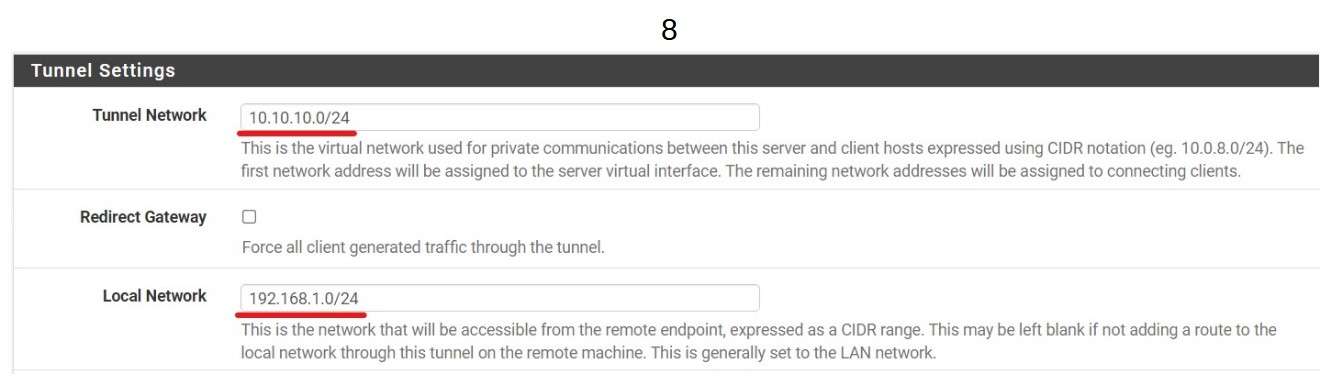
Then go to the OpenVPN Server Wizard to configure a VPN Server.
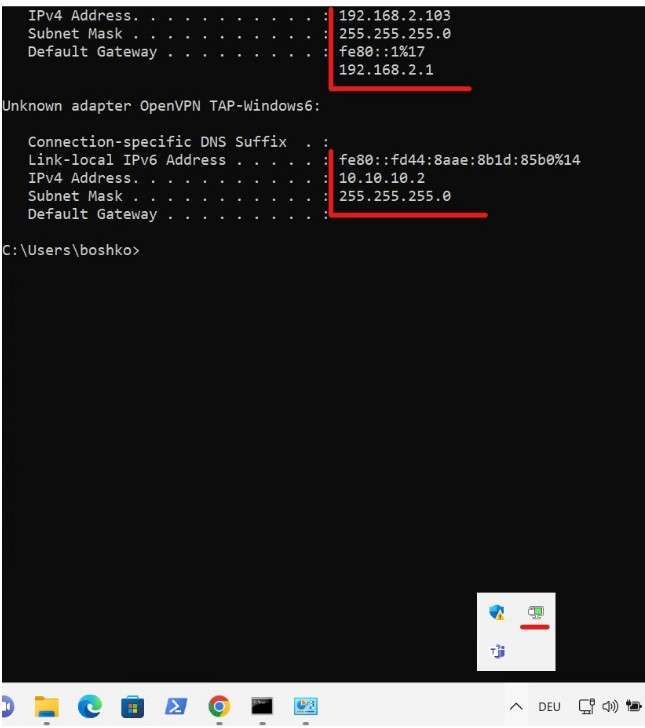
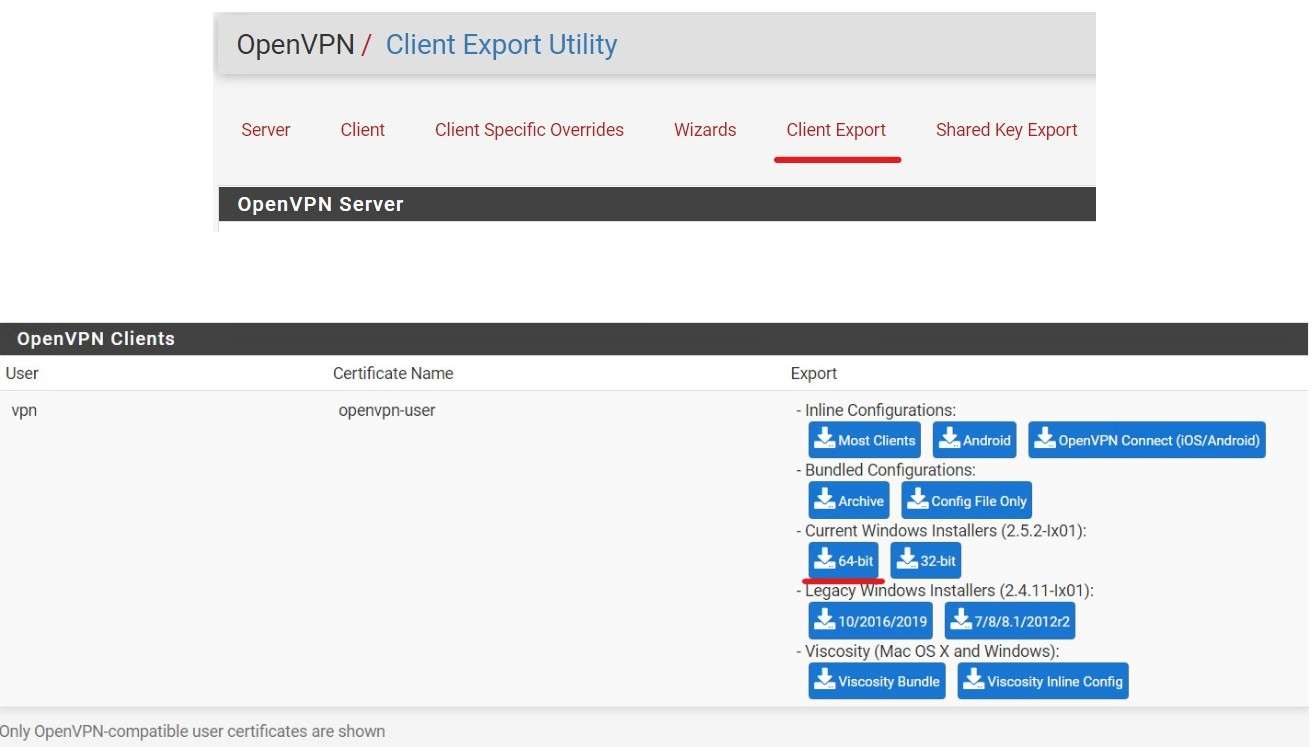
Adding a Tunnel Network 10.10.10.0/24 All VPN Clients will receive an IP address from this range. The first is reserved for VPN Gateway. Adding a local Network means that connected VPN Clients will be able to use resources from the LAN (for example a shared folder)
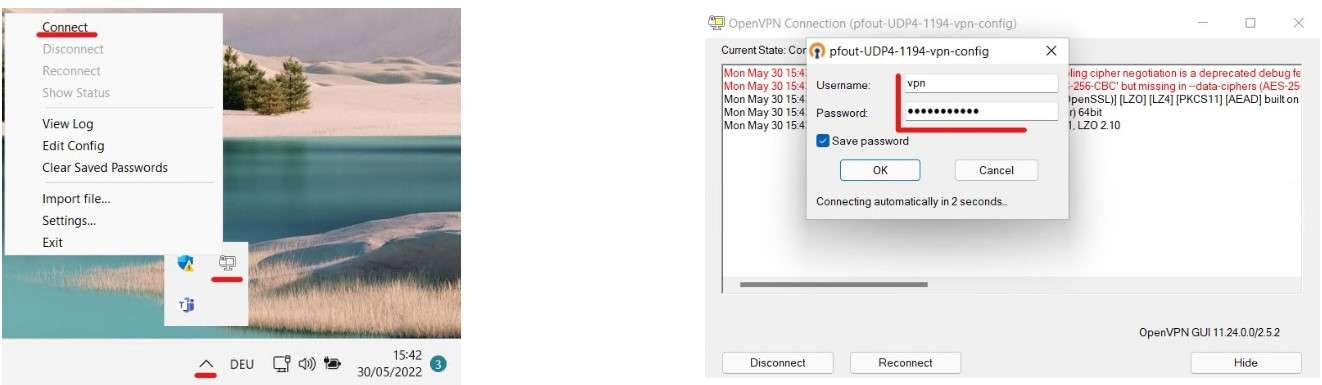
A client Export packet or Plug-in is very useful because we can download the OpenVPN Client with certificate for a specific User.
I transferred the VPN Client to the Windows 11 VM and installed it. After I entered the VPN user and Password I was able to authenticate this user to the OpenVPN Server.